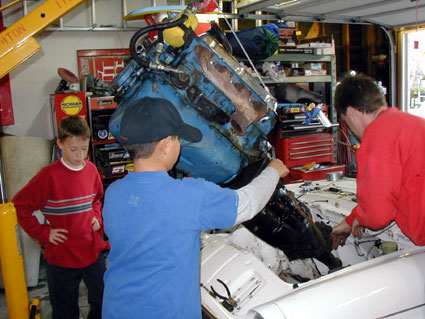
Step One is to remove the old engine (Figure 3) Note that it came out easily and complete out the top of the engine bay in a standard 2 car garage. I accomplished this on my own with the help of my 10 year old son, Josh, in Red. The neighbor's son, Alex, just liked to lean on the engine crane and was just interested in the goings on. I did use an Oberg engine tilter which was really pathetic as you really need one of those ones from Summit or make one with the four securing chains. Before I install the new engine and transmission I will have to make one or buy one.
Editor's Footnote: For an idea of how the Rootes Factory Manual pictures this operation, look at picture at bottom of page.
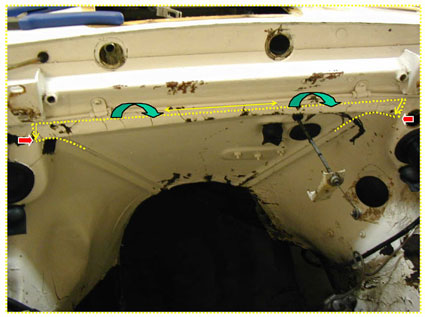
Figure 4
Before I started to cut anything I first beat both of the beading on both sides of the firewall flat down about 5 inches to facilitate cutting. I first started to see if it would be possible to gain the clearance I would need and when it was obvious that I could not I decided that cutting was my only option. I removed all of the carpeting and the backing from immediately behind where I was going to be working to avoid any smoky “surprises”. Then I used the bottom of the cross brace as my guide and used a small circular disc cutter to cautiously and cleanly cut the firewall across from directly above one corner of the tunnel to the other along the reinforcement brace exactly at the edge. Then cut down directly from the end of that cut to exactly the corner of the tunnel opening on both sides with the same cutoff saw. This downward cut was about One inch long. When you look at the firewall in Figure 4 it is pretty obvious where the corners of the tunnel currently are and the RED arrows indicate exactly on the Figure. The cut line is clearly marked as a DOTTED YELLOW LINE and although the tunnel cuts look curved they were actually straight along a curved panel.
Then I used an air chisel (Americans call it a Zip Gun) to cut down the middle of the beading on the tunnel itself (where it is now flattened) about 5 inches. The red arrows indicate the beginning of the cutting with the zip gun and the end of the cutting with the cutoff saw. I did the cuts in line with the beading following the center of where it used to be (the curved dotted yellow line in Figure 4 beginning at the red arrows). I then used duckbilled vise grips to carefully fold out the steel that pointed up to the cross brace (Note the wide Green Arrows in Figure 4). Then I removed the remains of the original Alpine firewall from the loosened piece of the Tiger firewall insert as it was still welded a little at one end. When you remove the 1/2 to 3/4 inch wide piece you can clearly see the torched edge of the original factory method of opening the Alpine firewall which was subsequently filled in by the Tiger specific firewall insert piece. I actually meant to save the strip of metal for posterity but inadvertently tossed it in the trash. Then I hammered and dollyed the piece as flat as possible using a Toe Dolly and a Cross Peen Body hammer.
Footnote:
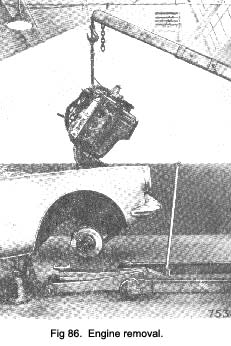
Rootes Workshop Manual, Section B., page 53, Fig. 86
 **
**