Clearance for Valve Covers
An Article by Tim Ronak
January, 2002
Page 3
How to Build Clearance to Easily Remove the Aluminum Valve Covers (cont.)
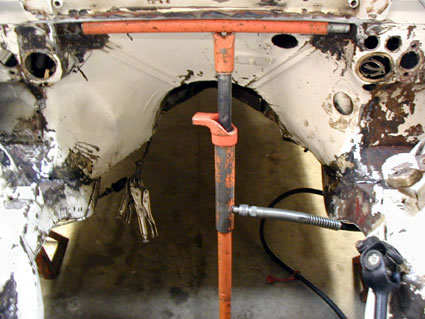
Figure 5
I then used a porta-power ram and some pipe to push the metal up and back until the edge of the metal exactly lined up with the now exposed lower edge of the crossbeam. (Figure 5) shows the positioning of the pipe and the ram although the firewall is already welded) The method here is to use an 18 inch length of pipe (I used one of my porta power pipes) against the firewall panel across the entire length with it back from the loose (forward) edge about 2.0 inches. It needs to be placed back from the edge so that the sheet metal can curve around the pipe when you apply ram pressure to the side of the pipe. It is important to note that it seems to correspond with how far under the firewall the Drivers side valve cover extends. Then equip the ram with the flat foot for the floor and one of the adapters intended to push against the side of pipe on the other end (usually a squarish adapter). Position the ram so that the base is about 6 inches forward of the leading edge of the loose panel directly below where you are going to push and jack enough to just apply pressure to hold things in place. It is about where the old firewall was curved originally. The ram should be leaning towards the rear of the car about 10-15 degrees. Now start to apply pressure to the ram. This will move the sheet metal up until it contacts the the bottom of the reinforcement and then as you apply more pressure it will slowly curve around the pipe and drag the front edge of the steel rearward. Continue to apply pressure slowly (careful it does not take much pressure) to have the panel slide rearward until it is flush with edge of the reinforcement. It does not take much pushing pressure at all and a burly guy may be able to just muscle it up…but again I am lazy and always look for the least effort approach. As I only had one ram I did the Passenger side first and tacked that corner then I aligned the driver's side and tacked it as well. I did this by locating the ram almost directly under the location I planned to tack weld in place. I then centered the ram on the pipe and tacked the middle and then STITCH welded it up all the way across the reinforcement on the firewall moving back and forth limiting the heat buildup. Then I built the little swedge tin pieces to fill in the gaps left by reshaping the firewall.
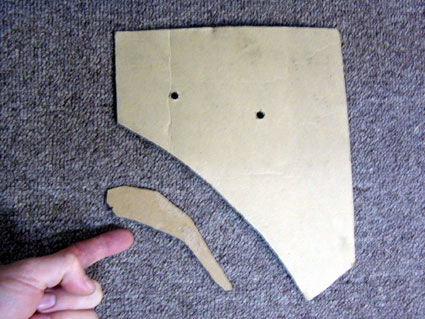
Figure 6
I did this by building a small card board template with scissors (Finger pointing to it in Figure 6) and then transferring the pattern to tin. You can also see the other template I made for the inner apron assembly. I then welded these in on either side of the transmission tunnel. After I welded it in it was clear that ALL of the original strength of the tunnel was restored and in fact was stronger than before. The welded patch on the driver’s side can be seen in Figure 7.
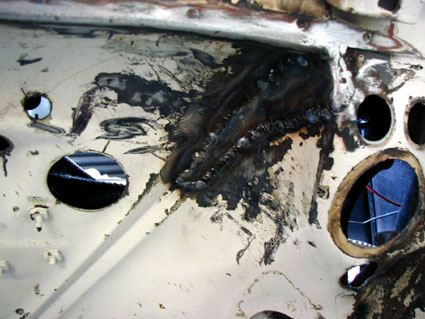
Figure 7
 **
**