SERVICING
Starter motor renewal
To remove and refit
1. Disconnect the starter cable at the starter terminal.
2. Remove the flywheel-housing-to-starter retaining screws and remove the starter assembly.
3. Position the starter assembly to the flywheel housing and refit the retaining screws finger tight.
4. Tighten the retaining screws by diagonal selection and reconnect the battery-to-starter-motor cable.
Dismantling (Refer to Fig. 21)
1. Loosen the brush cover band retaining screw and remove the brush cover band and the starter drive actuating lever cover.
2. Remove the commutator from their holders.
3. Remove the ‘through~ bolts, starter -drive gear housing and the starter drive actuating lever return spring.
4. Remove the pivot pin retaining the starter gear actuating lever and remove the lever and the armature.
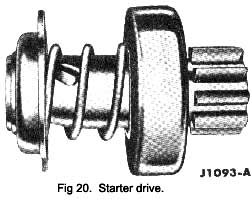
5. Remove the stop-ring retainer. Remove and discard the stop-ring retaining the starter drive--gear to the end of the armature shaft, and remove the starter drive-gear assembly.
6. Remove the brush end-plate.
7. Remove the two screws retaining the earth brushes to the frame.
|
8. On the field coil that operates the starter drive-gear actuating lever, bend back the tab on the field retainer and remove the field coil retainer.
9. Remove the three coil retaining screws, using the Pole Screw Wrench, Part No. 10044-A and an arbor press as indicated In Fig. 22. The arbor press prevents the wrench from slipping out of the screw. Unsolder the field coil leads from the terminal screw and remove the pole shoes and coils from the frame.
10. Remove the starter terminal nut, washer, insulator and terminal from the starter frame. Remove any excess solder from the terminal slot.
Cleaning and inspection
(Refer to Fig. 23)
1. Use a brush or air to clean the field coils, armature, commutator and armature shaft. Wash all other parts in solvent and dry thoroughly.
2. Inspect the armature windings for broken or burned insulation and detached soldered connections.
3. Check the armature for open circuit and earthling.
4. Check the commutator for’ run-out’ as indicated in the illustration and inspect the armature shaft and the two bearings for scoring and excessive wear. If the commutator is rough or pitted, or more than 0.002 in. (0.050 mm.) out-of-round, ‘turn’ it down in a lathe.
5. Check the brush holders for broken springs and the Insulated brush holders for shorts to earth. Tighten any rivets that may have loosened and renew any brush which has worn to within ~ in. (7.937 mm.) of its total length.
6. Check the brush spring -tension and renew any spring if the tension is not within the specified limits.
7. Inspect the field coils for burned or broken Insulation and continuity. Check the field brush soldered connections and lead Insulation.
Assembly (Refer to Fig. 21)
Using new parts as found necessary, assemble the starter motor as follows.
1. Refit the starter terminal, insulator, washers and retaining nut in the frame as shown In Fig. 24. Ensure to position the slot in the screw so that it is perpendicular to the frame and surface.
2. Position the coils and pole pieces, with the coil leads in the terminal screw slot, and then refit the retaining screws. As the pole shoe screws are tightened, strike the frame several times with a hide-faced hammer to seat and align the pole shoes, afterwards stake the screws.
|
 **
**