dwell angle variation should not exceed 60 when going from zero to maximum vacuum at constant r.p.m. If the dwell angle variation exceeds this limit, there is excessive wear at the stationary sub-plate pin or the diaphragm rod is bent or distorted.
Distributor shaft end play
If the shaft end play appears to be excessive, check the location of the distributor shaft collar.
- Remove the distributor from the engines
- Place the distributor in the holding tool and clamp it in a vice.
- Push the distributor shaft upward as far as it will go, then check the end play with a feeler gauge placed between the collar and the distributor base. The end play should be .002 ins.
DISTRIBUTOR—Removal and installation. Removal
- Disconnect the primary wire at the coil. Disconnect the vacuum advance line at the distributor. Remove the distributor cap.
- Scribe a mark on the distributor body and engine block indicating the position of the body in the block, and scribe another mark on the distributor body indicating the position of the rotor. These marks can be used as guides when installing the distributor in a correctly timed engine.
- Remove the distributor hold down cap screw and clamp. Lift the distributor out of the block.
Installation
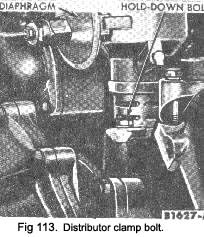
The distributor clamp bolt is shown In Fig. 113.
- If the crankshaft was rotated while the distributor was removed from the engine, it will be necessary to time the engine. Rotate the crankshaft until No. 6 piston is at T.D.C. after coming up on the compression stroke. This can be found by removing No. 6 spark plug, and screwing a suitable drilled plug to which a short length of rubber tube is attached, into the spark plug position. The outer end of the rubber tube Is Immersed In water and the engine rotated slowly by moving the car forward with top gear engaged. When air bubbles are seen in the water container the piston is coming up on its compression stroke, and engine movement is continued until the T.D.C. line on the damper rim comes adjacent to the fixed T.O.C. pointer.
This method of finding the compression stroke saves removing the rocker cover and possible damage cf its joint.
|
NOTE: THE STARTER MUST NOT BE USED TO ROTATE THE ENGINE BECAUSE WATER WILL BE DRAWN INTO THE CYLINDER IF THE PISTON MOVED OVER T.D.C.
Position the distributor in the block with the rotor at the No. 6 firing position.
Make sure the oil pump intermediate shaft properly engages the distributor shaft. It may be necessary to crank the engine with the starter, after the distributor drive gear is partially engaged, in order to engage the oil pump intermediate shaft.
Install, but do not tighten, the retaining clamp and screw. Rotate the distributor body counterclock-wise until the breaker points are just starting to open. Tighten the clamp.
2. If the crankshaft has not been rotated, position the distributor in the block with rotor aligned with the mark previously scribed on the distributor body, and the marks on the distributor body and engine block in alignment. Install the retaining clamp.
3. Install the distributor cap.
4. Connect the primary wire to the coil.
5. Check the Ignition timing with a timing light and adjust if necessary. Connect the vacuum line, and check the advance with the timing light when the engine is accelerated.
|
 **
**